FEATURE : Refret for Guitarist Magazine's Dave Burrluck
We recently had the great pleasure of taking on a couple of fab refret jobs for Dave Burrluck, who is the Reviews Editor and "tech" contributing author of the UK's leading Guitar title: Guitarist magazine.
He asked us to undertake some work on a couple of guitars, one of which would feature as the subject of his regular ‘The Mod Squad’ column in the hallowed pages of that magazine. Were we thrilled? You betcha!
Dave brought in two guitars: his old 1976 Guild S-90 electric and the slightly older, early seventies Gibson Les Paul Deluxe that we are about to go into more detail about.
The Les Paul Deluxe’s frets were original and the guitar had had extensive play which resulted in the frets being very low and there was some noticeable fingerboard wear. In fact, with the frets getting so low the risk of fingertip damage to the board was increased as time went on.
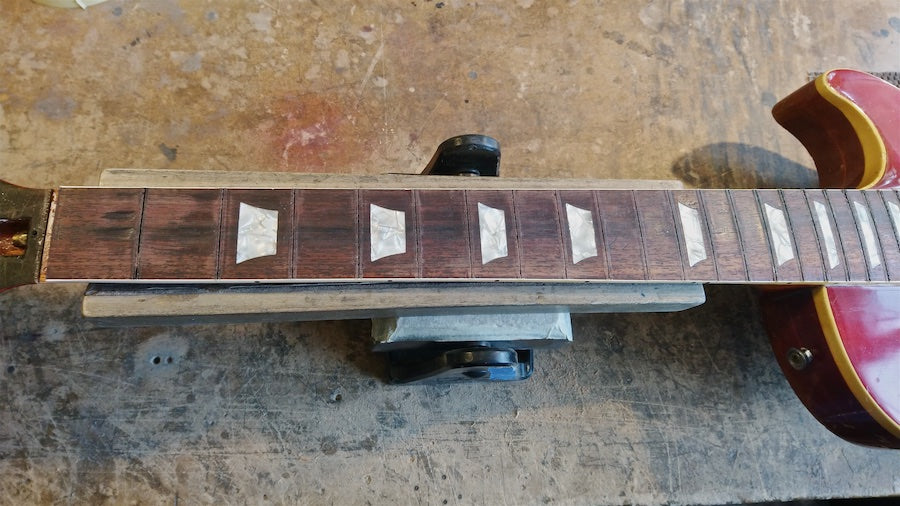
Here is a shot of the frets and you can see that they were low and quite flat-topped. So, our first job once we had assessed everything was to remove the old frets. We did apply a little heat via a soldering iron to help free-up each fret – it breaks the bond of any glue that may have been used, and causes a momentary expansion of the fret which then contracts again and makes it easier to extract.

We checked the fingerboard radius carefully as we would be levelling the board to true up any twist or humps and bumps in the board. We had asked how much fretboard wear we needed to remove as a few of the pits were rather deep. Dave said that he didn't wish to remove much - just enough to have the neck be true and straight for the re-fret, since he really didn't wish to have the feel of the neck change, and the wear patterns were part of the guitar’s life history.

With all the frets out here is the ‘board. Our main objective was to ensure that where the frets would be seated they would all be on the level.
We marked off the ‘board with chalk lines and proceeded to level it with a 12" radius contoured levelling beam. The chalk lines would show us where our levelling was hitting and where it wasn't. Obviously, the neck was adjusted as ‘arrow straight’ as it could be.

Here is a shot of an in-between stage where we had started to level: you may be able to see areas starting to be hit by the sandpaper-covered beam. Our aim was to get the areas where the frets seat to be level.

Okay, here it is at a stage that we were happy with: the fret seating areas are all level with each other and a guarantee that we would get a good installation of the fretwire. You can still see the areas of finger wear between the frets in places.

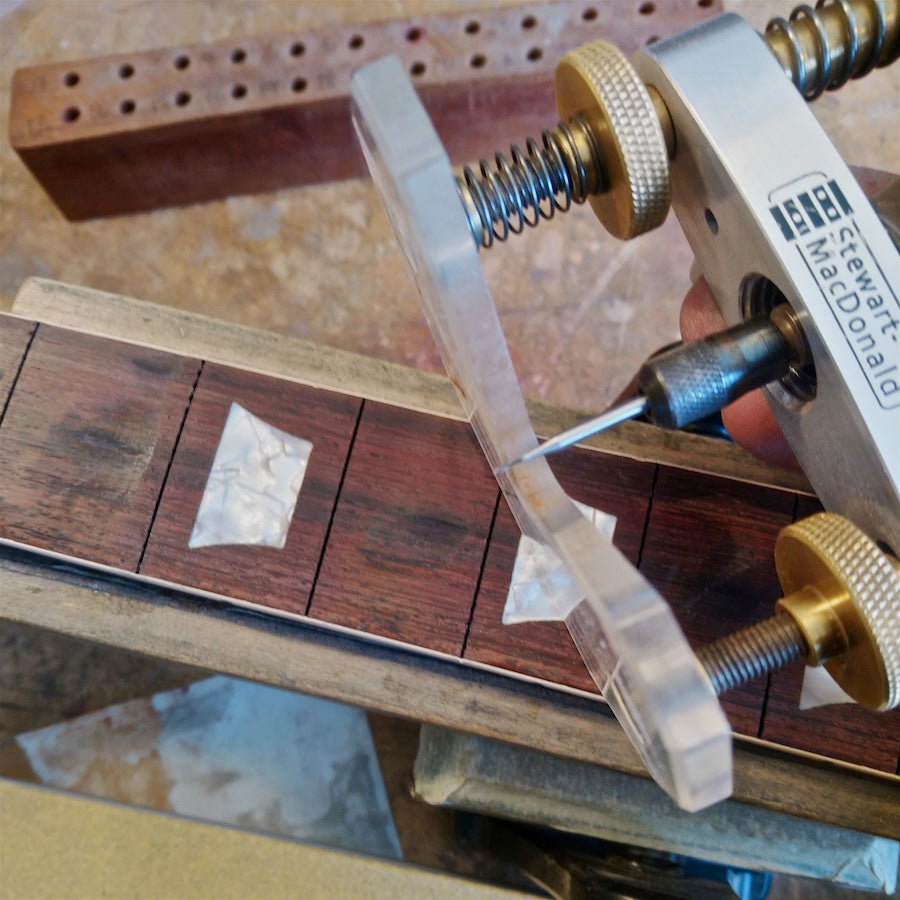
Next up was cleaning out the fret slots, which we do with a variety of tools including specially adapted saws, and a scraping hook and a tiny tapered cutter in a Dremel router (we made a replacement Perspex baseplate for our Dremel mount so we could see the fingerboard whilst cutting).
So with the slots perfected and ‘board fine-sanded and polished up to about 2000 grit, it’s time to start the fret installation.

To fit inside the binding the fret's tang must be trimmed to fit neatly within without too much gap.

We use a trusty pair of nippers to trim back the tang from the fret, but it does unfortunately leave a little remaining line of metal...

... which we must file away to leave just the fret's bead to go over the binding. This can be quite time consuming when you have to do 22 or 24 frets each time.

Here are the 22 frets all prepared in advance of the installation.

We use a mix of fret-pressing and some hammering too, and always with glue to gap-fill and secure the fret in place – it provides maximum coupling of the fret to the wood, to optimise the resonance.
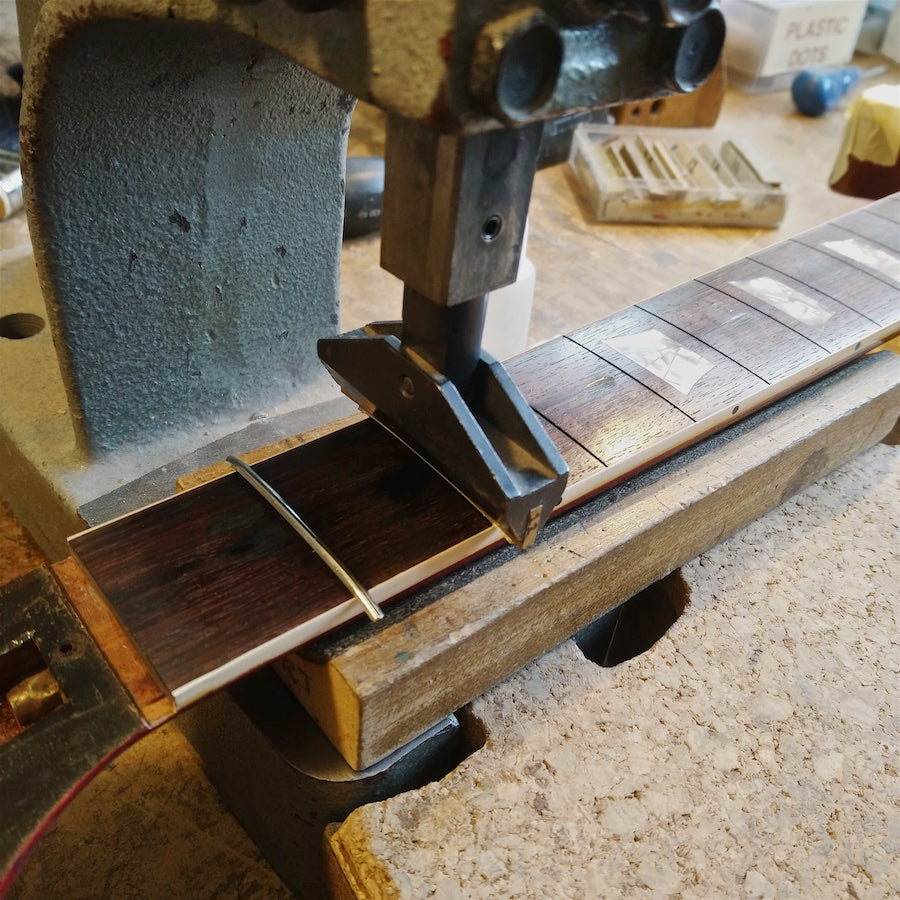
Here is a shot of all the frets in place. You can see the dead-blow hammer we use - one that doesn't ‘bounce’ when it hits the fret and reduces the tendency to cause the fret to spring up when struck.

Next we started to install a new nut as with new taller frets the old nut would be too low.
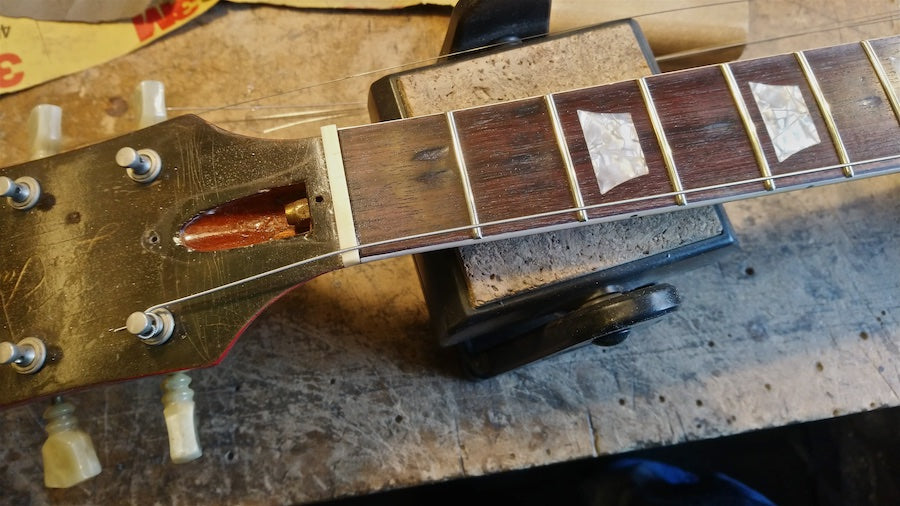
We start with the outermost strings getting a comfy spacing from the edge, then subdivide the remaining gap with a little calibration to take into account the differing thicknesses of the strings.

With the strings cut in and approximately to depth we could string up the guitar and prepare to put in into the ‘neck jig’ for the fret-dressing stage of the job. This process has been detailed in one or more of our spotlight features like here: Anatomy of a Fret Dress, so we will skip through some of those details in this feature as you can always read about it there.

Eventually we find ourselves at a point with the frets levelled and re-crowned and polished and the nut has also been shaped and polished.

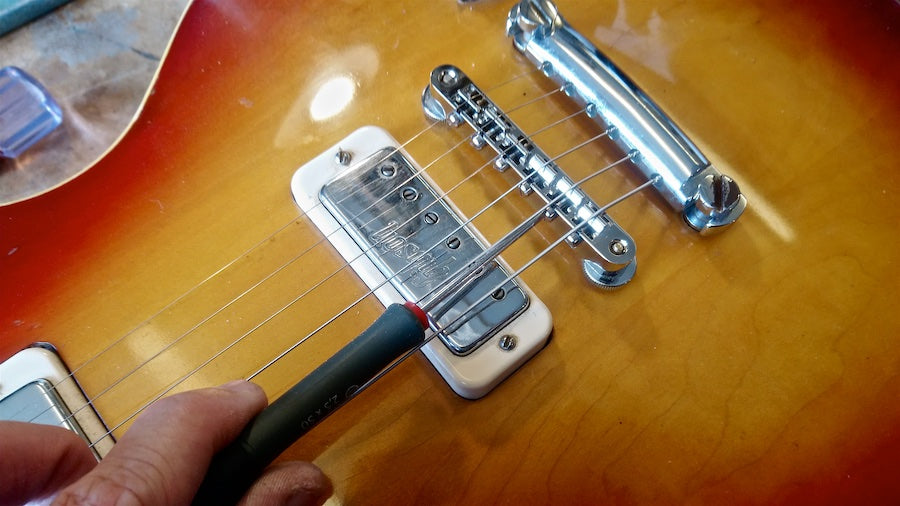
Here you can see the new Faber ABRH bridge , a correct replacement for the old ABR-1 that had been on the guitar. The new bridge comes with notched saddles, but they need properly cutting so the notches are sized for the strings.

With the string heights all dialled in nicely we did the final intonation setting for the strings of choice. We did a serious play test and then it was time to get the guitar back into Dave's eager hands.
The guitar clocked in at 6 hours on the bench along with the cost of the parts used: about 5 feet of 6155 fretwire, an unbleached bone nut, the Faber replacement bridge, and some fresh strings.
The other guitar we did (Guild S-90) clocked in at about the same in terms of time charged for and parts (apart from not requiring the bridge swap)
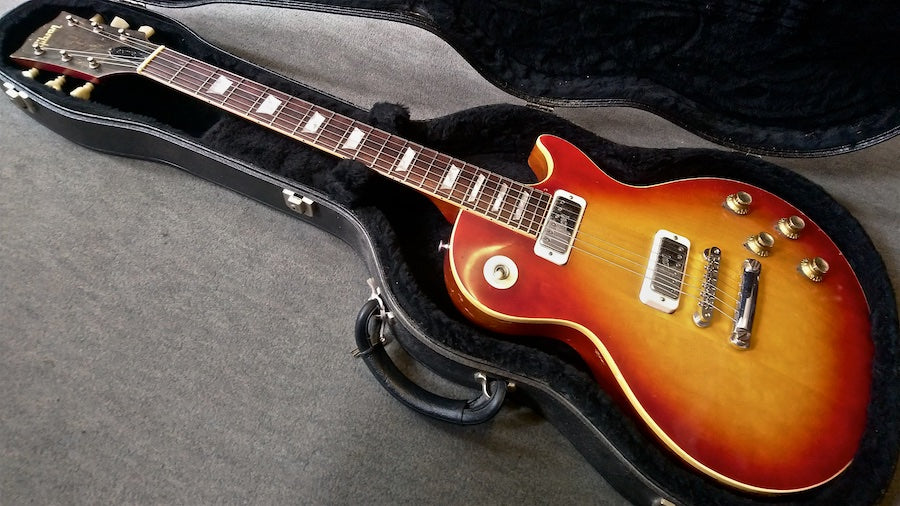
Here it is all ready to be ready to go back and be played and enjoyed.
So when Dave produced the article it looked something like this…


The work was featured in a lovely Mod Squad feature - we can't reproduce it here but check out a back issue of Guitarist if you would like to see it .
We asked Dave for a few thoughts on why he needed those refrets in the first place and, as a customer, what was his experience like?
REFRETS: A PERSONAL VIEW
“Looking over my friend’s early seventies Gibson Les Paul Deluxe, a guitar I’ve known for some four decades and used to own, it was pretty clear it needed some work. The original frets were so low I didn’t even want to waste a new set of strings. The thing is, it might be a bit bashed up (it had had a headstock break before I bought in around 1979/80) but it’s a superb sounding Deluxe with an unusual-for-the-period relatively light weight of 3.94kg (8.67lb). Deluxes, like any vintage instrument, continue to creep up in value and while this one is far from a pristine case queen, if it’s going to be referred to as ‘player’s grade’, it needs to play. I told my friend it needed a refret… and by someone who knows what they’re doing.
“I’d also purchased a 1976 Guild S-90 a few years back which again sounded superb – I’ve always liked those original low-wind Guild HB-1 humbuckers – but like the slightly older Deluxe its original frets were very low. I bundled both guitars into the old banger and set off for Croydon.
“Feline Guitar’s HQ is deliciously old school, a timeless workshop staffed by its three intrepid craftsman Jonathan Law, Tom Palmer, who's been with Feline for the past 12 years, and the newest recruit, Liam Mulford.
“Immediately I’m in the door, we were going over the two guitars. Jonathan certainly agreed with my thoughts about the frets and also noted that the Deluxe’s tune-o-matic had sunk and a new one would be needed to maximise the post-refret playability.
“Discussing the actual fretwire he planned to use is probably a topic itself. If someone has happily played a guitar for years with low wire, the last thing either of us wanted was dramatically change the feel with a bigger wire that might feel alien. Jonathan suggested Dunlop 6155 for the Deluxe and we decided to use that for the Guild as well. An hour or so later, having put the world to rights and sorted out the details of the re-fret, I left the Feline team to get on and do some work.
“Jonathan had been photographing the work as it progressed as I planned to use my experience for an episode of Guitarist magazine’s The Mod Squad. I could clearly see from those images that things had been carried out properly and two weeks later to the day, I was back in Croydon to collect the guitars.
“Having a quick play of both guitars was a revelation. The work was first class, that was obvious, but the feel and playability was, well, how it should have been over these past years. I’d originally owned the Deluxe back in the day and even then it never played this well! The Guild is a newer acquisition that I thought was good but it wasn’t the easiest to play. Now it felt exceptional. The team had even fixed the rather scratchy original pots. From being a guitar I would only use as a sound reference, it’s now a guitar I play every day and I’d happily say it sounds better too.
“Both jobs were similarly priced, a little north of £400 apiece, and while not every guitar will justify that sort of expense, the Deluxe certainly does – it’s honestly the only maintenance expense, aside from strings, it’s had in four decades. The re-fret cost doubled my outlay on the Guild but now, instead of being a guitar-shaped-object its playability matches it sound: superb!”
